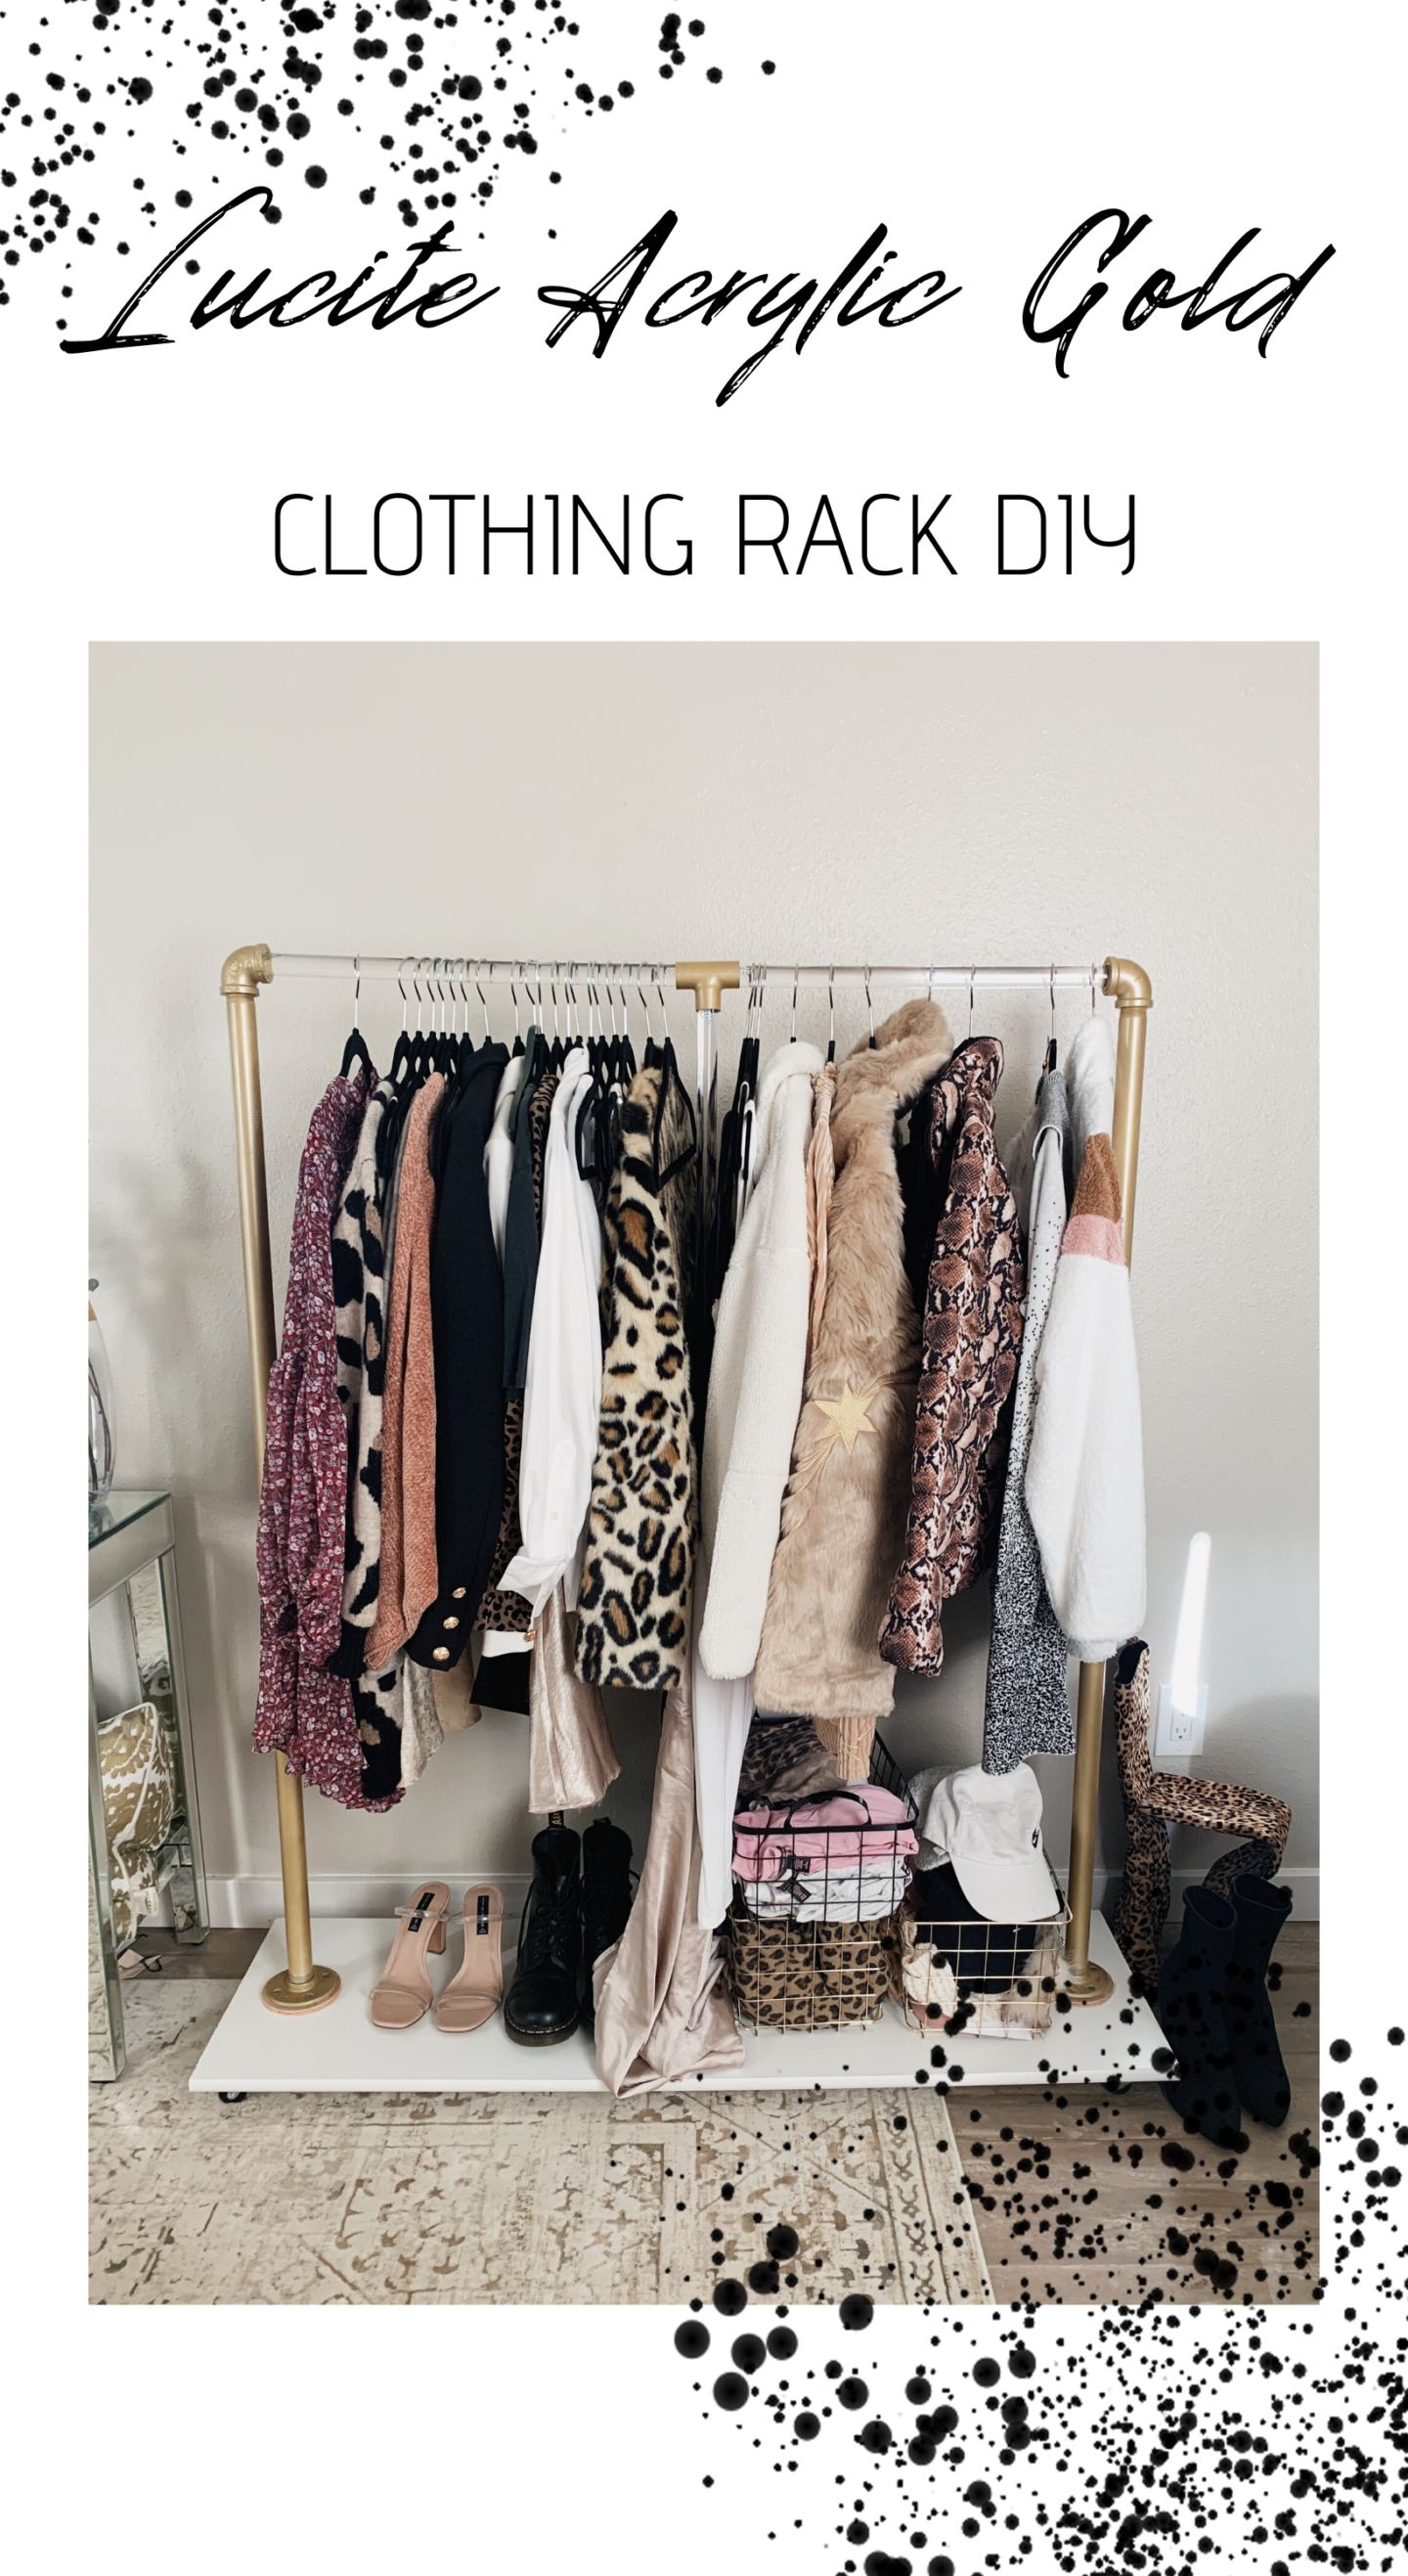
Lucite Acrylic Gold Clothing Rack DIY
When I moved into my apartment, I knew I wanted to change my clothing rack from THIS black one from Amazon to one that was more bright and light for space. The black one is great but just made that corner really dark.
I searched all over for an affordable Lucite Acrylic Gold Clothing Rack, but they were all close to $800. I texted my dad the plans I drew up and we created this one for under $200!
I. Am. Completely. Obsessed.
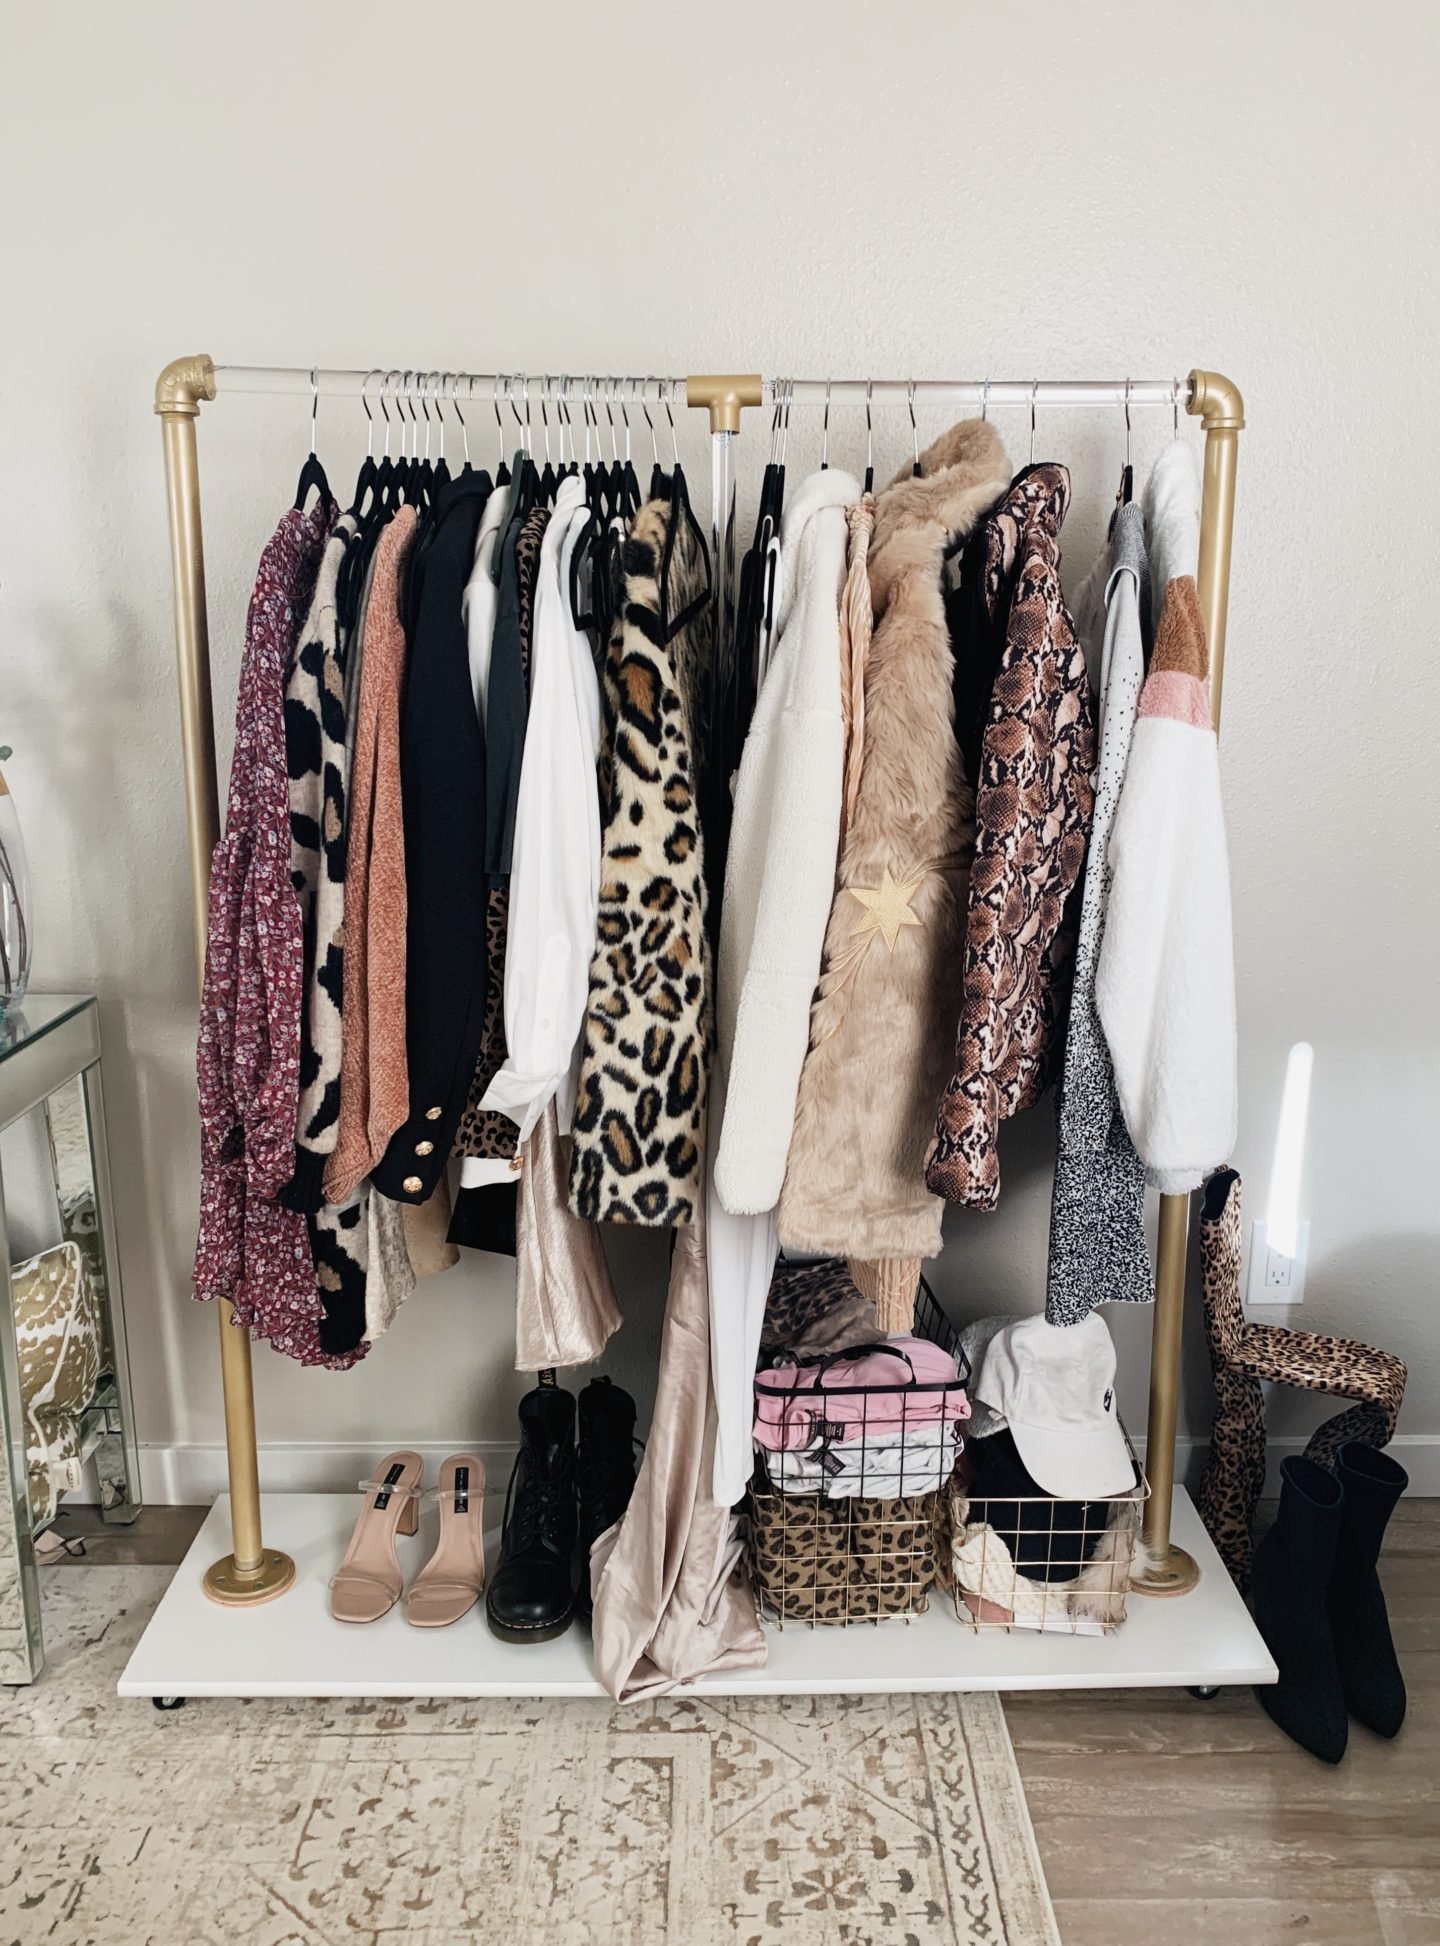
Lucite Acrylic Gold Clothing Rack DIY


MATERIALS
3/4" x 15 1/4" X 97" white shelving
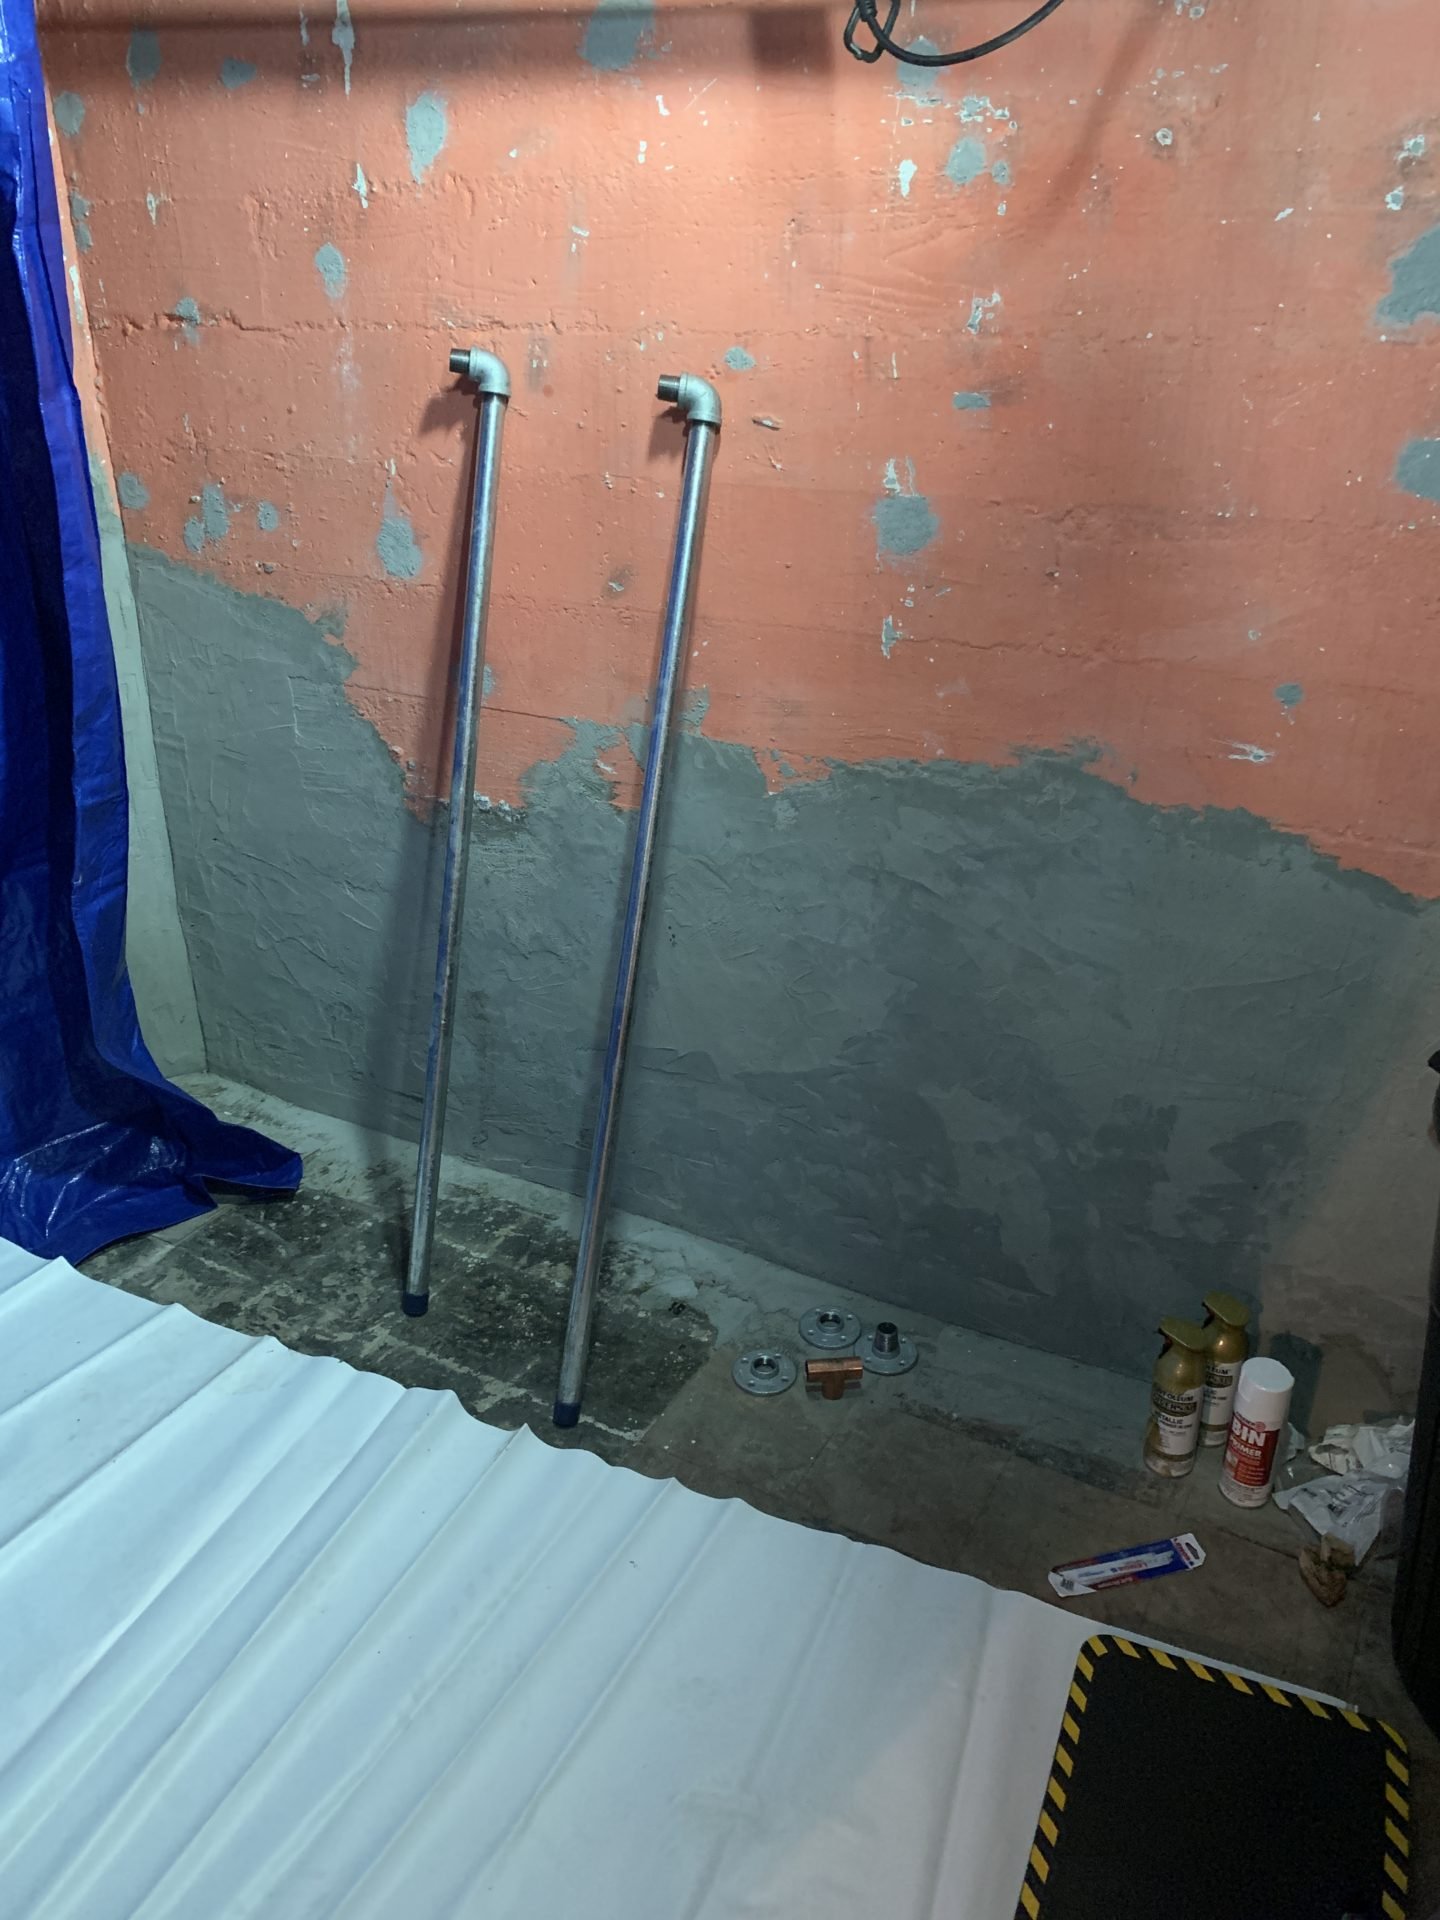
2 Galvanized Pipe 1 in x 54 in
3 Galvanized Floor Flange 1 in
2 Galvanized 45-degree Elbow 1 in
3 Galvanized Nipple 1 in x Close
1 Copper tee 1 in
4 Wheel Casters
2 Acrylic Rods (AMAZON baby!)
Zinsser Primer Spray
Rust-Oleum Pure Gold Spray Paint
total: under $200 vs. the one from Etsy for $800+
STEPS
- Insert a galvanized nipple into one side of the galvanized elbow and into one of the floor flanges.
- Cut off the remaining threads so that there is a flush end, this is going to tighten up space so that the acrylic can be placed securely without movement.
- Thread on the galvanized elbows to the two galvanized pipes.
- Prime all galvanized pieces with Zinsser Primer Spray.
- Once it's set and dry, spray all the galvanized pieces and the copper tee gold with the Ruse-Oleum Gold Spray paint.
- Cut white shelving piece to be 50" long.
- Flip shelving over and attach wheel casters to all 4 corners. I left about 1 in distance on either side of the caster.
- My dad and I cut circle pieces of wood to attach to the shelving that we then attached the floor flange to. This isn't necessary but we did this for good measure.
- Attach all 3-floor flanges to shelving, make sure the centerpiece is directly centered on the shelving and the outside flanges are attached leaving 1 1/2" on the edge.
- Twist galvanized pipe with elbow attached into the outside floor flanges.
- Cut the acrylic pieces to fit in their placements: my particular measurements are the top bar is 42" and the center support is 54". My dad cut these with a handsaw.
- Place copper tee painted gold onto the top bar acrylic piece, then place in the elbows.
- Place the support acrylic into the middle floor flange and into the bottom part of the copper tee.
- Take clear epoxy and coat the edges of the galvanized elbows, floor flange, and the copper tee to hold the acrylic pieces tight into the galvanized nipples.
- tada!